
Raspberry Pi Imager is an amazing tool that can help you flash your SD card with ease. The main reason why I think it’s great is: it is effortless to use. Hence, beginners with no prior knowledge of flashing SD cards can also use it with ease. Today marks the release of a new version, i.e., Raspberry Pi Imager V1.6.
Now, the Raspberry Pi Imager V1.5 wasn’t buggy, to begin with. V1.6 takes the software one step forward by including some of the complex features that advanced users were asking for. So, here’s what’s new in the Raspberry Pi Imager V1.6.
Raspberry Pi V1.6: Advanced Options Menu
The advanced options menu is not much “advanced” but adds some extra functionality to the tool. Mostly, it automates the things that users had to be manually done before. More on that in a minute. Here’s what the advanced options menu looks like.
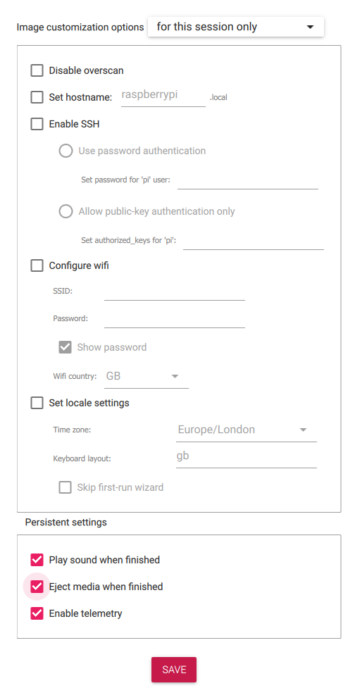
The advanced options menu can be accessed by holding the key combination Ctrl + Shift + X while the app is open.
Now, coming to the new features that have been added.
- You can now disable overscan. For starters, checking this option will allow Raspberry Pi OS to fill the empty gaps that are usually created on the first boot.
- You can now change the default hostname raspberrypi.local.
- Usually, when you need to access your Pi using SSH remotely, you’ll need to flash the SD card, create a file named SSH, and on top of that, add another file named wpa_supplicant to connect to Wi-Fi. But now, thanks to this update, you can create both files while flashing the SD card using the advanced options menu. This saves a ton of time!
- You can also skip the welcome wizard that runs at the beginning. All you need to do is set the time zone and the keyboard layout or check the “Skip first run wizard” option.
How To Install Imager V1.6?
- Head over to the official Raspberry Pi website.
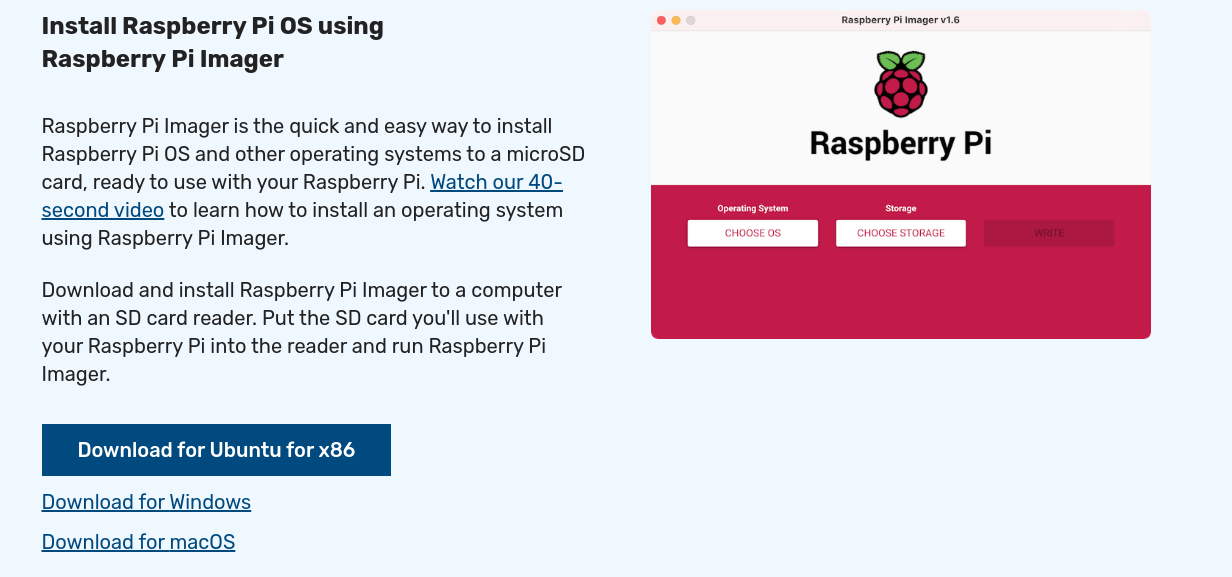
- Depending on which platform you’re on (Windows/Linux/macOS), the primary link button (Blue button in the above image) will change. All you need to do is click on it, and the .exe file or .deb file will begin downloading.
- After it’s downloaded, double-click on the file and the imager will be installed.
What do you think of this update? Let us know in the comments section below.
The post Raspberry Pi Imager v1.6: What’s New And How To Install? appeared first on Fossbytes.
from Fossbytes https://ift.tt/2Pd5Rpa
via IFTTT


No comments:
Post a Comment