

Have you ever read a tutorial on dual-booting your PC and found that you need to disable secure boot in order to achieve your goals? Yes, Secure Boot is a modern security feature built into Windows 10 (and Windows 8).
So, what is Secure Boot?
As the name says, Secure Boot is meant to safeguard to boot process when you start your computer; it’s found on newer PCs that come loaded with UEFI firmware. Secure Boot’s job is to prevent unsigned UEFI drivers and bootloaders from loading during the startup process.
This reduces the chances of unauthorized access to your device in case someone wants to steal data in your absence. However, the secure boot feature has faced some backlash as well, as it prevents people from doing some useful stuff on their machine. For example, running two operating systems at the same time.
But if you don’t want the feature, you can easily disable secure boot on your device.
How to disable secure boot in Windows 10, 8, 7?
The steps to turn off the secure boot feature are almost similar for both Windows 10 and Windows 8 systems.
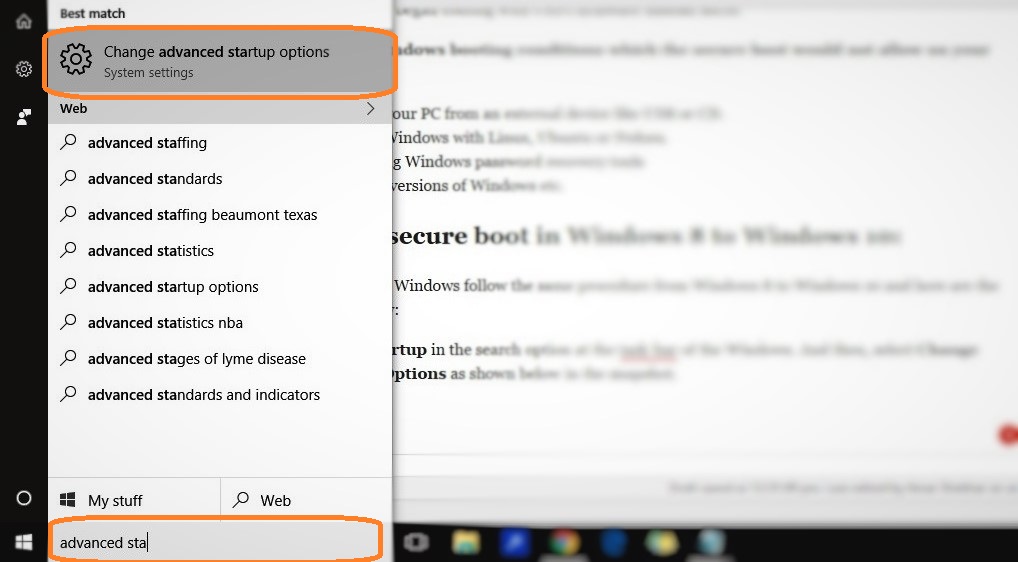
- Search Advanced startup in the search option at the taskbar of the Windows. Then, select Change advanced Startup Options as shown below in the snapshot.
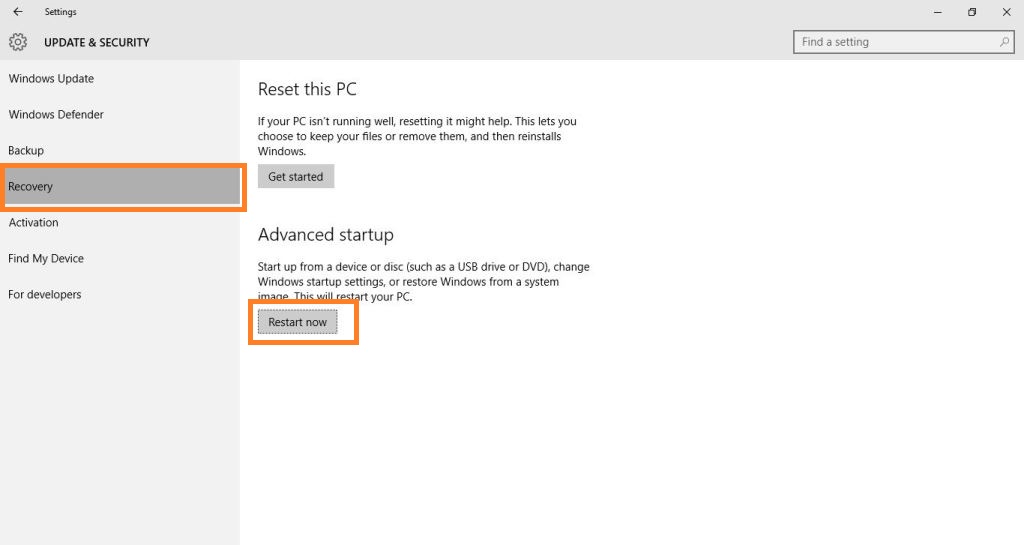
- Once you click on the “change advanced startup options”, the following screen will appear. You just have to click Restart now under the Advanced startup.
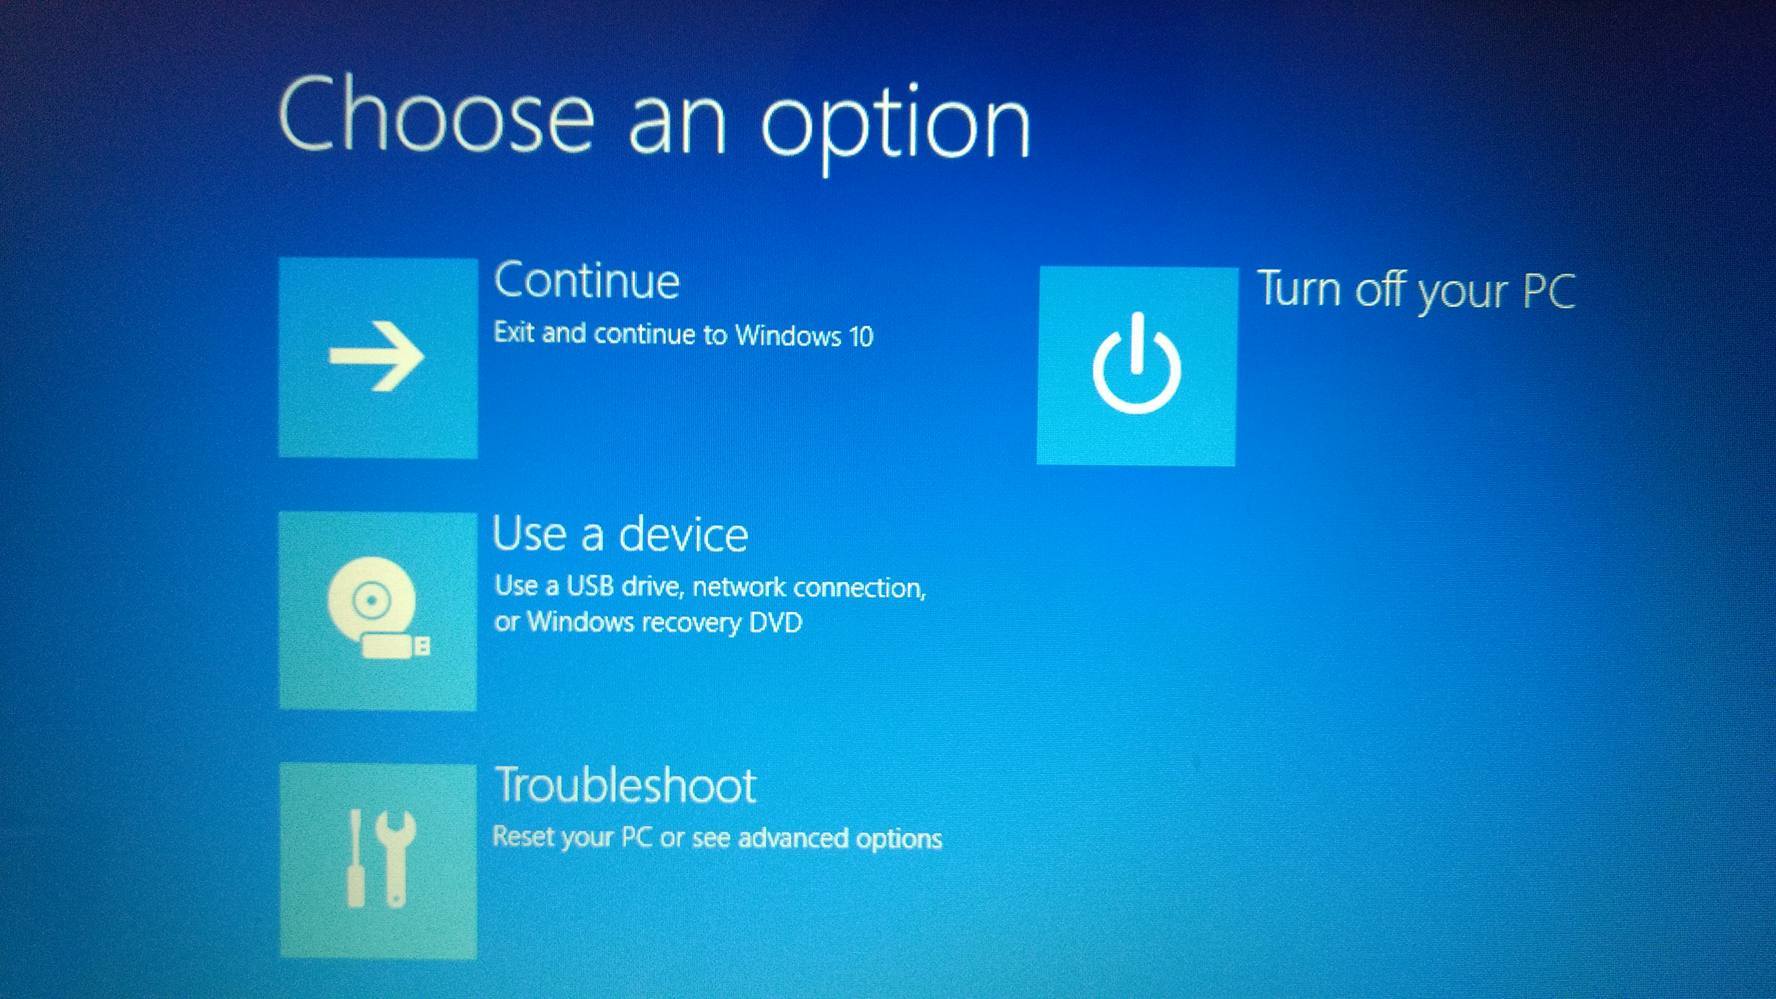
- The above command will restart your PC in the advanced mode which comes with lots of advanced options to let you configure your Windows. Some of the advanced options are using an external device, troubleshooting your Windows using advanced options, or resetting your PC etc. The screen appears something like this. Click on Troubleshoot.
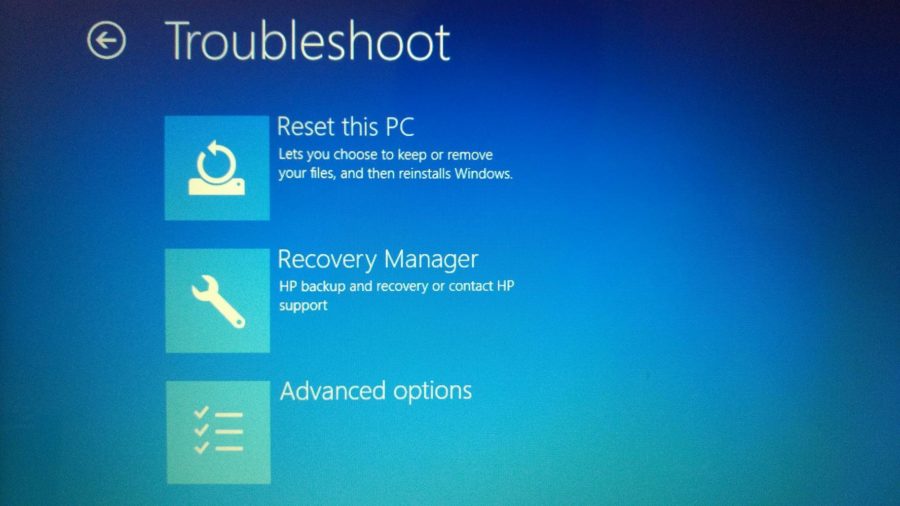
- You can see above that Troubleshoot option had two options–Reset your PC and Advanced options. So, once you click on Troubleshoot, you will the same two options coming up. Click on Advanced options as shown below.
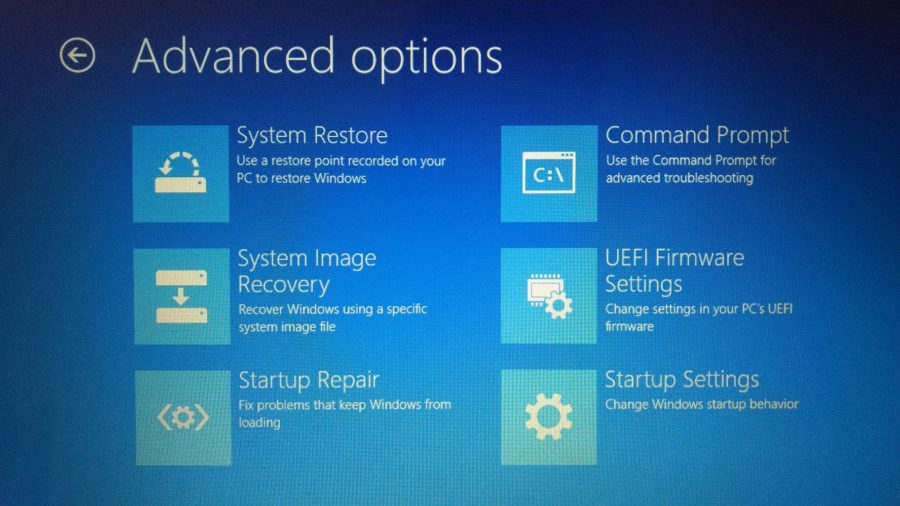
- The advanced options look something like this (as shown below). Select UEFI Firmware Settings.
- Once you click on the UEFI firmware settings, it will restart your system once again or ask you to restart the system. So, click on the restart on the next screen. However, this restart will start in BIOS and you will see different BIOS setup.
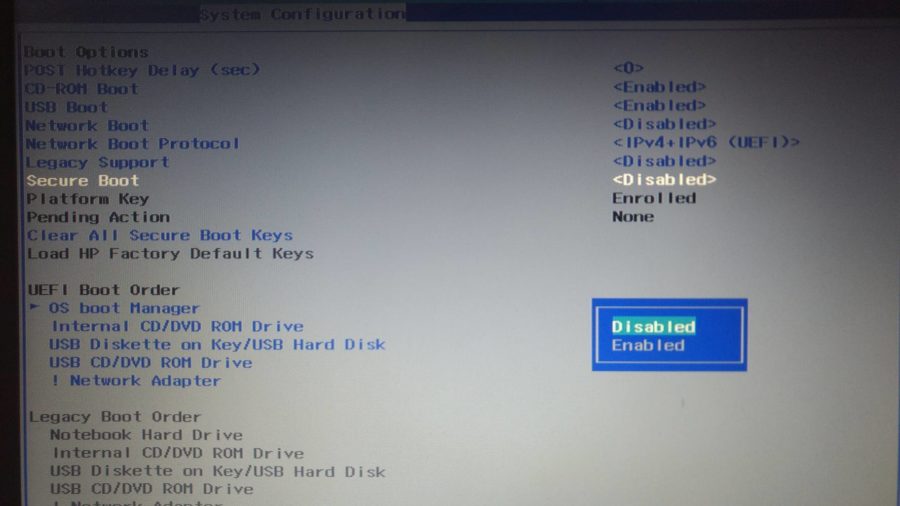
- Click on the Security tab under the BIOS settings.
- Use the Up and Down arrow to choose the secure boot option as shown in the previous image.
- Select the option using Arrows and change the secure boot from Enabled to Disabled.
- Press Enter.
- Save your work and exit.
Since the secure boot is now disabled, you can easily boot your devices with any external or unauthorized device.
Now, if you want to know to enable secure boot, then you can follow the same steps as above and change the secure boot setting to enabled.
What happens after I disable secure boot?
Your PC won’t check whether you’re running digital signed operating system after your turn of this security feature. However, you won’t feel any difference while using Windows 10 on your device.
Here are some conditions that would be allowed on your PC after disabling Windows secure boot option:
- Booting Windows on your PC from an external device like USB or CD.
- Dual OS booting like Windows with Linux, Ubuntu or Fedora.
- Booting Windows using Windows password recovery tools
- Running the previous versions of Windows etc.
Do I need to disable secure boot to install Windows 10?
No, you don’t need to disable secure boot to install Windows 10. In fact the security feature is already meant to ensure that the your copy of Windows you’re running is trusted by your OEM and safe to use. Keeping the feature enabled will only help in that.
Why can’t I disable secure boot on my PC?
One thing to note is that your PC may not have an option to disable it as it’s up to PC maker whether it wants to add the functionality or not. So, if you can’t find it on your device then you should contact your manufacturer for support.
So, this is what we know about secure boot and how to use it. If you have anything to add, drop your thoughts in the comments below.
The post How To Enable/Disable Secure Boot In Windows 10, 8.1, 8, 7? appeared first on Fossbytes.
from Fossbytes https://ift.tt/390m0F9
via IFTTT


No comments:
Post a Comment